Tuesday, December 10, 2013

*Link* Writers Against Mass Surveillance Petition

Ich habe heute die Petition Die Demokratie verteidigen im digitalen Zeitalter der Writers Against Mass Surveillance unterschrieben und bitte jeden, der diese Gedanken teilt, dies ebenfalls zu tun. Hier der Link:

http://www.change.org/de/Petitionen/die-demokratie-verteidigen-im-digitalen-zeitalter

Today I signed the petition A STAND FOR DEMOCRACY IN THE DIGITAL AGE created by the Writers Against Mass Surveillance and I hereby ask everybody sharing these thoughts to do the same. Follow this link:

http://www.change.org/de/Petitionen/a-stand-for-democracy-in-the-digital-age-3

Thursday, September 12, 2013

*Pics* Spinnentierchen aus dem Moos

Folgende Bilder habe ich heute mit einem USB-Mikroskop (20- und 80-fache Vergrößerung) gemacht. Die Tiere, die nicht größer als einen Millimeter sein können, waren in deutlich größerer Zahl in einer Handvoll Moosproben enthalten. Ich kann die Mundwerkzeuge nicht gut erkennen. Gut sichtbar sind die Haare am Hinterleib sowie die acht Beine. Milbe oder Zecke?

Saturday, August 17, 2013

Create a KNOPPIX USB (boot-)stick from a running Linux system

I was recently examining, how to boot a (live) KNOPPIX from an USB stick. It turns out I did not find a manual about how to create a bootable USB stick containing KNOPPIX without burning KNOPPIX to a CD/DVD first?! So this is a short howto without burning anything. I'm showing how to put a KNOPPIX ISO image to an USB stick. I need an ISO image of KNOPPIX, an USB stick and syslinux installed. I've chosen to put the 4GB DVD image KNOPPIX_V7.2.0DVD-2013-06-16-EN.iso onto a 16GB USB stick. The place left on the USB device should be available to the user as NTFS partition. I'll use the term /dev/sdX to refer to the stick (where X is a lowercase character, e.g. /dev/sdb) and completely empty it first (THIS WILL DELETE ALL DATA INCLUDING THE PARTITION TABLE!):

shred -z /dev/sdX

Now after the ISO image has been downloaded, we need to alter it a bit. For this some information about the USB stick is required. The relevant bits heads and sectors/track are highlighted below:

fdisk -l /dev/sdX

Disk /dev/sdX: 16.0 GB, 16008609792 bytes
64 heads, 32 sectors/track, 15267 cylinders, total 31266816 sectors
Units = sectors of 1 * 512 = 512 bytes
Sector size (logical/physical): 512 bytes / 512 bytes
I/O size (minimum/optimal): 512 bytes / 512 bytes
Disk identifier: 0x0000

   Device Boot      Start         End      Blocks   Id  System

Now we change the ISO image for hybrid mode:

isohybrid -o 1 -h 64 -s 32 -e 1 KNOPPIX_V7.2.0DVD-2013-06-16-EN.iso

and copy the ISO image to the USB stick:

cat KNOPPIX_V7.2.0DVD-2013-06-16-EN.iso > /dev/sdX

After the command has succeeded, the partition table will show a bootable "Hidden HPFS/NTFS" partition. Note that you can adjust the partition type by using the -t, --type switch of isohybrid.

fdisk -l /dev/sdX

Disk /dev/sdX: 16.0 GB, 16008609792 bytes
64 heads, 32 sectors/track, 15267 cylinders, total 31266816 sectors
Units = sectors of 1 * 512 = 512 bytes
Sector size (logical/physical): 512 bytes / 512 bytes
I/O size (minimum/optimal): 512 bytes / 512 bytes
Disk identifier: 0x0000

   Device Boot      Start         End      Blocks   Id  System
/dev/sdX   *           1     8032255     4016127+  17  Hidden HPFS/NTFS

Now we can create one or more partitions on the stick for shipping data or $whatever by using fdisk, e.g. create a new primary partition and set the type to HPFS/NTFS/exFAT:

fdisk /dev/sdX

Command (m for help): p

Disk /dev/sdX: 16.0 GB, 16008609792 bytes
64 heads, 32 sectors/track, 15267 cylinders, total 31266816 sectors
Units = sectors of 1 * 512 = 512 bytes
Sector size (logical/physical): 512 bytes / 512 bytes
I/O size (minimum/optimal): 512 bytes / 512 bytes
Disk identifier: 0x12345678

   Device Boot      Start         End      Blocks   Id  System
/dev/sdX   *           1     8032255     4016127+  17  Hidden HPFS/NTFS

Command (m for help): n
Partition type:
   p   primary (1 primary, 0 extended, 3 free)
   e   extended
Select (default p): p
Partition number (1-4, default 2): 2
First sector (8032256-31266815, default 8032256): 
Using default value 8032256
Last sector, +sectors or +size{K,M,G} (8032256-31266815, default 31266815): 
Using default value 31266815

Command (m for help): t
Partition number (1-4): 2
Hex code (type L to list codes): 7
Changed system type of partition 2 to 7 (HPFS/NTFS/exFAT)

Command (m for help): p

Disk /dev/sdX: 16.0 GB, 16008609792 bytes
64 heads, 32 sectors/track, 15267 cylinders, total 31266816 sectors
Units = sectors of 1 * 512 = 512 bytes
Sector size (logical/physical): 512 bytes / 512 bytes
I/O size (minimum/optimal): 512 bytes / 512 bytes
Disk identifier: 0x12345678

   Device Boot      Start         End      Blocks   Id  System
/dev/sdX1   *           1     8032255     4016127+  17  Hidden HPFS/NTFS
/dev/sdX2         8032256    31266815    11617280    7  HPFS/NTFS/exFAT

Command (m for help): w

[..]

Run mkfs.ntfs on /dev/sdX2 to create the NTFS file system there. The USB stick is ready now. Connected to the system where one wants to start a live KNOPPIX and chosen to boot this system from USB will result in a running KNOPPIX system.

The same should also work for creating a Debian live system USB stick. Thanks to the author of this article.

Friday, August 16, 2013

N54L LCD-Mod with U204FR-A3 (LCDModkit) and lcdproc (II)

Here it goes. I was looking for an LCD display for my microservers 5,25'' bay and found this neat post. The manufacturer of the LCD display used there provides different displays for this purpose. I've decided for an U204FR-A2 in black with a red backlight. It left Hongkong around five days later and arrived here another 6 days later. All in all: I got it after 11 days.

I unpacked the LCD device. It comes with an internal USB connector and is driven by an Hitachi HD44780 LCD controller. The connection wasn't a problem at all. I've already put a Silverstone SST-EC04-P PCIe card with two USB 3.0 external ports and an internal 19pin dual port connector into the systems PCIe 1x slot. Now to connect the LCD with this card I've bought an Inline 19pin USB 3.0 header to 8pin double USB 2.0 header adapter and connected the card with the LCD display. Easy, right?

To make the display "attached" to the case - it comes with two steel sheets and two screw holes each, that cannot be attached to anything in the microserver case - I've used a small workaround: double-faced adhesive tape and two halfs of a matchbox - one can also use small scantlings - and created a bonding between the steel sheets and the case.

That's it. I put the cover plate carefully back - the steels sheets of the LCD display and the LED of the server will bump to each other!

There are two programs to output information to the LCD display. These are lcdproc and lcd4linux. I started with the first one which only provides pre-defined screens. Seems with the latter one can create own screens. This is an option for the future.

lcdproc consists of two programs. First there is a daemon called LCDd. It controls the driver, contrast etc.pp. The relevant parts of its configuration file /etc/LCDd.conf look like as shown below. Note that I did not change the default values for contrast or brightness.

[server]
Driver=hd44780
WaitTime=25

[hd44780]
ConnectionType=lcd2usb
Size=20x4

To print something to the screen one can use the lcdproc command, which is configured via /etc/lcdproc.conf. I've enabled the Iface, TimeDate, SMP-CPU, and MiniClock screens. The program is started during startup via cron. The file /etc/cron.d/lcdproc simply contains this:

@reboot root    lcdproc

The following pictures show the resulting screens, which change every 25 seconds. That's it.

*Pics*

Eine punktierte Zartschrecke (leptophyes punctatissima) womöglich. Zitat Sieht aus wie ein Alien. :)

Fundort: Dresden, 25.07.2013

*Pics*

Ich vermute, es handelt sich um eine Libellenlarve von libellula depressa. Die rote Färbung erklärt sich durch den Austritt von eisenhaltigem Grundwasser in dem Bereich. Größe ca. 2,5 cm.

Fundort: Schönfelder Dorfbach, Kreis Meissen, 15.08.2013

HP N54L Microserver - energy efficiency and power management

I recently worked on activating power management functions, reduce energy consumption and noise of my little HP N54L "toy". During this process I tried to avoid the usage of /etc/rc.local and set things by udev, hdparm and friends. Below are my results.

Actual results

With the following steps my system (N54L + 3xWD20EFRX HDD +1xWD5003AZEX HDD + LCD-mod + case fan mod + Debian Wheezy) uses 27W in idle mode. The USB W-LAN card uses another 10W. In active mode, e.g. compiling source code, the system runs (and boots) with around 57W. The highest power consumption observed is during startup phase with 88W.

First things first

For the following steps it might be necessary to have some packages installed, that maybe do not occur in this post. If I missed something, I appreciate a hint. Further the following steps might produce even better results with a custom kernel. I'm using the stock linux-image-3.2.0-4-amd64 kernel image as the time of writing and I have these packages installed: amd64-microcode, firmware-linux, firmware-linux-free, firmware-linux-nonfree and firmware-atheros (the latter for my WLAN card).

ASPM and ACPI

First I enabled PCIE ASPM in my (non-modded) BIOS and forced it together with ACPI via grub by changing GRUB_CMDLINE_LINUX_DEFAULT in /etc/default/grub so it looks like this:

GRUB_CMDLINE_LINUX_DEFAULT="quiet splash acpi=force pcie_aspm=force nmi_watchdog=0"

ASPM has now been enabled as lspci prooves:

00:04.0 PCI bridge: Advanced Micro Devices, Inc. [AMD] RS780/RS880 PCI to PCI bridge (PCIE port 0) (prog-if 00 [Normal decode])
[..]
                LnkCap: Port #1, Speed 5GT/s, Width x1, ASPM L0s L1, Latency L0 <64ns, L1 <1us
                        ClockPM- Surprise- LLActRep+ BwNot+
                LnkCtl: ASPM L0s L1 Enabled; RCB 64 bytes Disabled- Retrain- CommClk+
                        ExtSynch- ClockPM- AutWidDis- BWInt- AutBWInt-
[..]
00:06.0 PCI bridge: Advanced Micro Devices, Inc. [AMD] RS780 PCI to PCI bridge (PCIE port 2) (prog-if 00 [Normal decode])
[..]
                LnkCap: Port #3, Speed 5GT/s, Width x1, ASPM L0s L1, Latency L0 <64ns, L1 <1us
                        ClockPM- Surprise- LLActRep+ BwNot+
                LnkCtl: ASPM L0s L1 Enabled; RCB 64 bytes Disabled- Retrain- CommClk+
                        ExtSynch- ClockPM- AutWidDis- BWInt- AutBWInt-
02:00.0 USB controller: Renesas Technology Corp. uPD720201 USB 3.0 Host Controller (rev 03) (prog-if 30 [XHCI])
[..]
                LnkCap: Port #0, Speed 5GT/s, Width x1, ASPM L0s L1, Latency L0 <4us, L1 unlimited
                        ClockPM+ Surprise- LLActRep- BwNot-
                LnkCtl: ASPM L0s L1 Enabled; RCB 64 bytes Disabled- Retrain- CommClk+
                        ExtSynch- ClockPM- AutWidDis- BWInt- AutBWInt-
[..]
03:00.0 Ethernet controller: Broadcom Corporation NetXtreme BCM5723 Gigabit Ethernet PCIe (rev 10)
[..]
                LnkCap: Port #0, Speed 2.5GT/s, Width x1, ASPM L0s L1, Latency L0 <1us, L1 <64us
                        ClockPM+ Surprise- LLActRep- BwNot-
                LnkCtl: ASPM L0s L1 Enabled; RCB 64 bytes Disabled- Retrain- CommClk+
                        ExtSynch- ClockPM- AutWidDis- BWInt- AutBWInt-
[..]

Even so /sys/module/pcie_aspm/parameters/policy will still show as below:

[default] performance powersave

I'll show how to set the powersave value in /sys/module/pcie_aspm/parameters/policy in the next section.

JFTR: These are my ACPI related packages installed: acpi, acpid, acpi-support and acpi-support-base.

Enable powersaving via UDEV

The following rules file /etc/udev/rules.d/90-local-n54l.rules has been inspired by a blog post. It enables powersaving modes for all PCI, SCSI and USB devices and ASPM. Further the internal RADEON cards power profile is set to the low value. There is no monitor connected usually. The file contains these rules:

SUBSYSTEM=="module", KERNEL=="pcie_aspm", ACTION=="add", TEST=="parameters/policy", ATTR{parameters/policy}="powersave"

SUBSYSTEM=="i2c", ACTION=="add", TEST=="power/control", ATTR{power/control}="auto"
SUBSYSTEM=="pci", ACTION=="add", TEST=="power/control", ATTR{power/control}="auto"
SUBSYSTEM=="usb", ACTION=="add", TEST=="power/control", ATTR{power/control}="auto"
SUBSYSTEM=="usb", ACTION=="add", TEST=="power/autosuspend", ATTR{power/autosuspend}="2"
SUBSYSTEM=="scsi", ACTION=="add", TEST=="power/control", ATTR{power/control}="auto"
SUBSYSTEM=="spi", ACTION=="add", TEST=="power/control", ATTR{power/control}="auto"

SUBSYSTEM=="drm", KERNEL=="card*", ACTION=="add", DRIVERS=="radeon", TEST=="power/control", TEST=="device/power_method", ATTR{device/power_method}="profile", ATTR{device/power_profile}="low"

SUBSYSTEM=="scsi_host", KERNEL=="host*", ACTION=="add", TEST=="link_power_management_policy", ATTR{link_power_management_policy}="min_power"

Set harddrives spindown timeout

I decided to sent my system drive to standby after 20 minutes and the RAID drives after 15 minutes. This is usually ok, because the RAID isn't always used. hdparm is the right tool to realize this. Many people use the /dev/disk/by-uuid/... syntax here, to avoid having to touch the configuration file if some system configuration changes. Because I'm running a RAID, I couldn't use this syntax, although it might be possible to use /dev/disk/by-id/... instead. Well for the moment I stay with the configuration below. The relevant part of /etc/hdparm.conf is:

[..]

# system harddrive
/dev/sda {
        spindown_time = 240
}

# below are the WD20EFRX drives
/dev/sdb {
        spindown_time = 180
}

/dev/sdc {
        spindown_time = 180
}

/dev/sdd {
        spindown_time = 180
}

Idle mode

When there is nothing to do for the system, all I hear is the (still a bit noisy) fan of the power supply, which I might replace in the future too. Either by testing a different fan or by replacing the whole power supply unit by the fanless FORTRON FSP150-50TNF or (even better) a picoPSU.

The system currently shows a power consumption of around 37W in idle mode whereas the USB W-LAN card itself needs around 10W. There is a possibility to enable power savings mode for this card too. I could add this entry to /etc/udev/rules.d/90-local-n54l.rules:

SUBSYSTEM=="net", ACTION=="add", KERNEL=="wlan*" RUN+="/usr/bin/iw dev %k set power_save on"

But it turned out that the connection became a bit unstable after it. So I don't use this rule.

More on the road

There are a lot more options one can easily find via $search_engine. The N54L system could be brought to sleep and woken up by LAN via Wake-on-LAN (WOL). This is a feature I don't use. I've also read rumors about enabling different sleep/suspend states of the system, which seems to require to install a modded BIOS. Well, I'll post news and changes if they happen to come;)

Friday, August 9, 2013

Local link networking on Debian/Linux between server and workstation

My network is based on wireless LAN, which is running at 54MBit/s. Transfering files between two systems therefor is not very fast. I could use wired connections, but cables would need to be pretty long to connect to the router. However the file server and the workstation are located near to each other and both have a free Gigabit LAN link. So why not connect these systems directly?

Both systems run network-manager, whereas the server runs without a graphical/desktop environment. The file /etc/network/interfaces contains this entry related to the LAN devices on both systems:

allow-hotplug eth0
auto eth0

To create the connection it is necessary to have the package avahi-autoipd installed. In a graphical environment is is then as easy as open the network(-manager) preferences dialog, create a new wired connection, change to the IPv4 Settings tab in its Options dialog and choose the Link local only method. Done.

On the server I have no desktop environment. Therefor I wrote the necessary file /etc/NetworkManager/system-connections/LocalLink myself. The UUID value can be obtained via uuid -n 1:

[802-3-ethernet]
duplex=full
mac-address=<MAC-address>

[connection]
id=LocalLink
uuid=<value of: uuid -n 1>
type=802-3-ethernet
timestamp=0
autoconnect=true

[ipv6]
method=auto

[ipv4]
method=link-local

I restarted the manager via service network-manager restart on the server and the link came up too. The direct link was ready.

A note: I was able to create the connection by using a patch cable because my cards are able to handle the situation. On older systems it might be necessary to use a cross-over-cable.

I would really like to use bonding on the wired ethernet and the wireless devices. But the wireless connections are done via router whereas the ethernet connections are created via local link. I think, this is impossible. Any ideas/hints?

Saturday, August 3, 2013

Setting up a network buildd with pbuilder, ccache, inoticoming and NFS

I recently bought an N54L HP microserver, which shall act as a build-daemon (buildd) for Debian packaging. The idea of my workflow is the following:

  1. do the maintenance tasks locally, usually using svn-buildpackage, quilt etc.pp
  2. build a source package locally
  3. upload the source to an incoming directory on the server
  4. watch this incoming directory and start a build process as soon as a package is uploaded
  5. put the result into an accessible directory
  6. support different vendors (debian, ubuntu)
  7. support different releases (experimental, unstable, stable, oldstable)
  8. support different architectures (amd64, i386)
  9. speed up the build process

Setting up the building environment

My first idea was to use sbuild as described in several places. However I went with pbuilder for a long time having a setup I personally like. So I decided to stay with it. I reduce the time and work to update the configure files by using

  • one central file /etc/pbuilderrc.inc defining all the common/shared settings and
  • small configure files defining vendor, release, architecture and mirrors

Here are the relevant parts of my central configure snippet:

[..]
EXTRAPACKAGES="apt-utils debconf debconf-utils libfile-fcntllock-perl"
[..]
BASETGZ="/var/cache/pbuilder/base.$DISTRIBUTION.$ARCHITECTURE.tgz"
APTCACHE="/var/cache/pbuilder/aptcache/$DISTRIBUTION/$ARCHITECTURE/"
BUILDRESULT="/var/cache/pbuilder/result/$DISTRIBUTION/$ARCHITECTURE/"
[..]
case "$VENDOR" in
ubuntu)
MIRRORSITE="http://archive.ubuntu.com/ubuntu"
COMPONENTS="main restricted universe multiverse"
OTHERMIRROR="\
deb http://de.archive.ubuntu.com/ubuntu $DISTRIBUTION main restricted universe multiverse|\
deb http://archive.ubuntu.com/ubuntu $DISTRIBUTION-updates main restricted universe multiverse|\
deb http://security.ubuntu.com/ubuntu $DISTRIBUTION-security main restricted universe multiverse|\
"
;;
*)
MIRRORSITE="http://ftp.debian.org/debian"
COMPONENTS="main contrib non-free"
OTHERMIRROR="\
deb http://ftp.de.debian.org/debian $DISTRIBUTION main contrib non-free|\
"
;;
esac
[..]
DEBBUILDOPTS="-us -uc -j2"
AUTO_DEBSIGN=no
USE_PDEBUILD_INTERNAL=yes
[..]

You get the main idea, right? Create own files and directories for each architecture, release and vendor. Further I only want to pull build related packages into the build environment, not into the server environment. So I enabled USE_PDEBUILD_INTERNAL. I don't want to sign anything on the buildd itself and use both cores. That's what DEBBUILDOPTS and AUTO_DEBSIGN are used for. Further I saw some warnings reported during build processes. I therefor install the packages mentioned in EXTRAPACKAGES to every build enviroment. The following are the configure files for the unstable amd64 (default) and the stable i386 build environments:

VENDOR="debian"
DISTRIBUTION="sid"
ARCHITECTURE="amd64"

. /etc/pbuilderrc.inc
VENDOR="debian"
DISTRIBUTION="wheezy"
ARCHITECTURE="i386"

. /etc/pbuilderrc.inc

OTHERMIRROR+="\
deb http://security.debian.org $DISTRIBUTION/updates main contrib non-free|\
"

Now to not having to update all of these environments manually there is a small parallelized script /usr/local/sbin/update-pbuilder-chroots:

#!/bin/sh

t=$(tempfile -p .upc. -s .list) || exit 1

cat > $t << EOF
/etc/pbuilderrc.amd64.sid
/etc/pbuilderrc.i386.sid
/etc/pbuilderrc.amd64.wheezy
/etc/pbuilderrc.i386.wheezy
/etc/pbuilderrc.amd64.squeeze
/etc/pbuilderrc.i386.squeeze
EOF

parallel /usr/sbin/pbuilder update --override-config --configfile :::: $t | tee -a /var/log/pbuilder.log

rm -f $t

exit 0

The script will make sure, that every change to the configuration file(s) will be considered (--override-config) and is run once a week via cron. The default build environment is updated on a daily base without this restriction:

@reboot root    rm -rf /var/cache/pbuilder/build/*/ >> /dev/null 2>&1
@daily  root    test -x /usr/sbin/pbuilder && /usr/sbin/pbuilder update --configfile /etc/pbuilderrc.amd64.sid | tee -a /var/log/pbuilder.log >> /dev/null 2>&1
@weekly root    test -x /usr/local/sbin/update-pbuilder-chroots && /usr/local/sbin/update-pbuilder-chroots >> /dev/null 2>&1
Speeding up the build process

Sometimes it is necessary to recompile a package. The tool to speed up this process is ccache, which can be easily integrated into pbuilder by setting CCACHEDIR in /etc/pbuilderrc.inc. It acts like a cache for compiled files and avoids recompilation in several buildd runs.

CCACHEDIR=/var/cache/pbuilder/ccache

It is also possible to use a TMPFS for BUILDPLACE to speed up the build process itself. In this case APTCACHEHARDLINK must be disabled. Well, yeah, I don't do this.

Watch an incoming directory and start the build process

Not much to say about this except that the user nobody is used to run the pbuilder command. Therefor it is necessary to mention this in /etc/sudoers to allow him to do this via sudo command:

Defaults        env_keep = "DH_OPTIONS DH_VERBOSE DEB_BUILD_OPTIONS DH_OPTIONS MAKEFLAGS CC CXX CPP F77 F90"
[..]
nobody          ALL=NOPASSWD:/usr/sbin/pbuilder

The first line is only necessary, if a pbuilder command is started with one of these environmental variables set. This can be useful when e.g. debugging a build failure with a future gcc version that is not yet the default or when debugging a clang build issue or when creating non-stripped binary packages for creating a backtrace (BTW: When there is a common repository of all debugging symbols created?).

Now to start the build process, I created an incoming directory with mods 777 at /var/cache/pbuilder/incoming/ and use inoticoming to watch it. This is started during boot via cron. The following shows the entry for the default unstable amd64 build environment:

@reboot root    /usr/bin/inoticoming --logfile /var/log/inoticoming.log --pid-file /var/run/inoticoming.pid /var/cache/pbuilder/incoming --chdir /var/cache/pbuilder/incoming --suffix .dsc --stderr-to-log --stdout-to-log /bin/su -c '/usr/bin/sudo /usr/sbin/pbuilder build --autocleanaptcache {}' nobody \;

Done. That's how the basic buildd works.

Getting the results

The pbuilder BUILDRESULT directory with mods 777 is shared via NFS mount to the workstation. After successfully building the package, debsign and dput can be used as usual.

Setting up the workstation

I use svn-buildpackage for most of my packages. Because pbuilder won't download source tarballs on demand by default (maybe via hook?), the tarball must always be included building the source package, which then gets uploaded via dput to the buildd. This is considered in the command listed in svn-builder in ~/.svn-buildpackage.conf (note, below shows my personal layout):

svn-builder=debuild --post-dpkg-buildpackage-hook=\"dput -f buildd /usr/local/src/packages/$PACKAGE/%p_%s_source.changes\" --no-lintian -d -sa -us -uc -S
svn-override=origDir=/usr/local/src/packages/$PACKAGE
svn-override=buildArea=/usr/local/src/packages/$PACKAGE
[..]

The host buildd has been added to ~/.dput.cf:

[buildd]
fqdn = mybuildd
login = mylogin
method = scp
incoming = /var/cache/pbuilder/incoming
allow_unsigned_uploads = 1
run_lintian = 0

Done. Now the svn-buildpackage command will create a source package including the source tarball and upload it to the buildd, where the package building starts right after the upload.

Conclusions

This is the main setup which works nicely for the default build environment so far. On the TODO list is to extend this setup so I can easily deal with all the architectures and releases (point 6..8 at the beginning).

Update 17.02.2015

The original article suggested to use the %v variable in the hook to transfer the _sources.changes file to the build-daemon. This will fail if the source version e.g. is X:Y-Z in which case the file created is package_Y-Z_source.changes but the command to execute is:

dput -f buildd package_X:Y-Z_source.changes

and thus will fail. According to dpkg-buildpackage(1) the hook command also accepts a %s variable, which seems to extract the superflous version characters.

Wednesday, July 31, 2013

N54L LCD-Mod with U204FR-A3 (LCDModkit) and lcdproc *pic*

N54L LCD-Mod with U204FR-A3 (LCDModkit) and lcdproc CPU screen

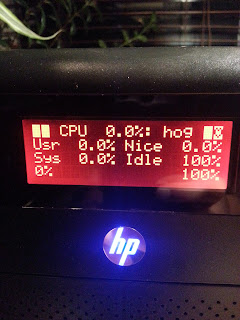
The picture shows my HP N54L microserver with an LCD (item no. U204FR-A3 by LCDModkit). The display is controlled via LCDd and lcdproc using the hd44780 driver. It shows the so called CPU screen here. To be continued soon ... :)

Friday, July 12, 2013

Reconfiguring my mail server to reject spam

I now spent some time in optimizing my mail server configuration, especially adjusting the rules, which clients and mails get accepted and which not. In its current setup, it's already configured to not act as an open relay. Mails sent via the server have to use SMTP-AUTH.

So these are the rules, that get applied now:

smtpd_delay_reject = yes
smtpd_data_restrictions =
        reject_unauth_pipelining
smtpd_client_restrictions =
        permit_sasl_authenticated,
        permit_mynetworks,
        reject_invalid_hostname,
        reject_unknown_client_hostname,
        reject_non_fqdn_hostname,
        reject_rbl_client sbl-xbl.spamhaus.org
smtpd_sender_restrictions =
        reject_unknown_address,
        reject_unknown_sender_domain,
        reject_non_fqdn_sender
smtpd_recipient_restrictions =
        permit_sasl_authenticated,
        permit_mynetworks,
        reject_unauth_destination,
        reject_unknown_recipient_domain,
        reject_unverified_recipient,
        reject_non_fqdn_recipient,
        permit

At the moment it already reduced the amount of spam by around 90 %. I hve not yet seen any downside, but I have to check these settings a bit longer to be sure.

Moving from (software) RAID 1 to RAID 5 and testing performance

Finally I finished migrating my new N54L from a 2-disk software RAID 1 (2x2TB WD20EFRX) to 3-disk RAID 5 (3x2TB WD20EFRX) using mdadm. I got an excellent mini HOWTO I followed. Resyncing and reshaping the RAID took several days ... top speed was 110.000K/s ... but left my data untouched. Finally growing the RAID now I have two partitions; one with 0.5GB (md0) and the other with 3.4GB (md1) which both host an EXT4 file system, whereas the first one is encrypted via LUKS and the second one is not.

RAID device and file system configuration

Below is a summary of the setup and the values I found working well for my system.

3-disk RAID 5 device file system
device chunk stripe_cache_size read_ahead_kb type encryption stride stripe-width
/dev/md0 64 4096 32768 ext4 luks 16 32
/dev/md1 512 16384 32768 ext4 no 128 256

I've played around with the system a bit. Changing the chunk size on the fly however took a long time. /dev/md0 will contain some backups, so there probably will be a mixture of small and large files. So I've chosen to only test the values 64K, 128K and 512K (default) for this device. I left the other untouched as it will mainly contain large files.

Performance measurement

Below are the results using hdparm to measure performance. First lets take a look at the drives ...

$ hdparm -tT /dev/sd[bcd]
/dev/sdb:
 Timing cached reads:   3268 MB in  2.00 seconds = 1634.54 MB/sec
 Timing buffered disk reads: 438 MB in  3.00 seconds = 145.87 MB/sec

/dev/sdc:
 Timing cached reads:   3292 MB in  2.00 seconds = 1646.32 MB/sec
 Timing buffered disk reads: 392 MB in  3.01 seconds = 130.22 MB/sec

/dev/sdd:
 Timing cached reads:   3306 MB in  2.00 seconds = 1653.18 MB/sec
 Timing buffered disk reads: 436 MB in  3.00 seconds = 145.26 MB/sec

$ hdparm --direct -tT /dev/sd[bcd]
/dev/sdb:
 Timing O_DIRECT cached reads:   468 MB in  2.01 seconds = 233.17 MB/sec
 Timing O_DIRECT disk reads: 442 MB in  3.00 seconds = 147.15 MB/sec

/dev/sdc:
 Timing O_DIRECT cached reads:   468 MB in  2.00 seconds = 233.69 MB/sec
 Timing O_DIRECT disk reads: 392 MB in  3.01 seconds = 130.36 MB/sec

/dev/sdd:
 Timing O_DIRECT cached reads:   468 MB in  2.00 seconds = 233.94 MB/sec
 Timing O_DIRECT disk reads: 442 MB in  3.01 seconds = 146.93 MB/sec

... and now at the RAID devices ...

$ hdparm -tT /dev/md?
/dev/md0:
 Timing cached reads:   3320 MB in  2.00 seconds = 1660.37 MB/sec
 Timing buffered disk reads: 770 MB in  3.01 seconds = 256.05 MB/sec

/dev/md1:
 Timing cached reads:   3336 MB in  2.00 seconds = 1668.07 MB/sec
 Timing buffered disk reads: 742 MB in  3.01 seconds = 246.89 MB/sec

$ hdparm --direct -tT /dev/md?
/dev/md0:
 Timing O_DIRECT cached reads:   974 MB in  2.00 seconds = 487.08 MB/sec
 Timing O_DIRECT disk reads: 770 MB in  3.01 seconds = 256.17 MB/sec

/dev/md1:
 Timing O_DIRECT cached reads:   784 MB in  2.00 seconds = 391.18 MB/sec
 Timing O_DIRECT disk reads: 742 MB in  3.01 seconds = 246.42 MB/sec

... and now lets see, which actual speed we reach using dd. First lets check the encrypted device:

RAID-5 /dev/md0 (LUKS encrypted EXT4): chunk=64K, stripe_cache_size=4096,
   readahead(blockdev)=65536, stride=16, stripe-width=32 ...

$ dd if=/dev/zero of=/mnt/md0/10g.img bs=1k count=10000000
10000000+0 Datensätze ein
10000000+0 Datensätze aus
10240000000 Bytes (10 GB) kopiert, 64,1227 s, 160 MB/s

$ dd if=/mnt/md0/10g.img of=/dev/null bs=1k count=10000000
10000000+0 Datensätze ein
10000000+0 Datensätze aus
10240000000 Bytes (10 GB) kopiert, 85,768 s, 119 MB/s

Well, read speed is consistently lower than write speed for the encrypted file system. Lets take a look at the non-encrypted device:

RAID-5 /dev/md1 (EXT4): chunk=512K, stripe_cache_size=16384,
   readahead(blockdev)=65536, stride=128, stripe-width=256 ...

$ dd if=/dev/zero of=/mnt/md1/10g.img bs=1k count=10000000
10000000+0 Datensätze ein
10000000+0 Datensätze aus
10240000000 Bytes (10 GB) kopiert, 37,0016 s, 277 MB/s

$ dd if=/mnt/md1/10g.img of=/dev/null bs=1k count=10000000
10000000+0 Datensätze ein
10000000+0 Datensätze aus
10240000000 Bytes (10 GB) kopiert, 33,5901 s, 305 MB/s

Looks nice to me.

How to set these values

I use a mixture of udev, util-linux and e2fsprogs to set the values.

First I checked, which values for stripe_cache_size and read_ahead_kb are working best for me. For the LUKS encrypted EXT4 I got varying results showing best performances with values of 4096, 8192 and 16384 for stripe_cache_size. I decided for the first value, because it appeared more often with the best performance than the others.

$ less /etc/udev/rules.d/90-local-n54l.rules | grep stripe_cache
SUBSYSTEM=="block", KERNEL=="md0", ACTION=="add", TEST=="md/stripe_cache_size", TEST=="queue/read_ahead_kb", ATTR{md/stripe_cache_size}="4096", ATTR{queue/read_ahead_kb}="32768", ATTR{bdi/read_ahead_kb}="32768"
SUBSYSTEM=="block", KERNEL=="md1", ACTION=="add", TEST=="md/stripe_cache_size", TEST=="queue/read_ahead_kb", ATTR{md/stripe_cache_size}="16384", ATTR{queue/read_ahead_kb}="32768", ATTR{bdi/read_ahead_kb}="32768"

The read_ahead_kb value can also be set using blockdev. Note that this command expects a value of 512-byte sectors whereas read_ahead_kb is the size in kbyte. Therefor the difference in values:

$ blockdev --setra 65536 /dev/md[01]

Tuning the EXT4 file system performance with calculated values using tune2fs:

$ tune2fs -E stride=16,stripe-width=32 -O dir_index /dev/mapper/_dev_md0
$ tune2fs -E stride=128,stripe-width=256 -O dir_index /dev/md1

Disabling NCQ reduced the speed a lot for me, so I left the values as is and did not struggle with it:

$ cat /sys/block/sd[bcd]/device/queue_depth 
31
31
31

Sunday, June 30, 2013

Dear Lazyweb ... why does lshw (still) identify my Linux raid autodetect partition(s) as NTFS volumes?

In a very first attempt, my disk:2 was partitioned and initialized as follows:

/dev/sdc1     1,5TB     NTFS
/dev/sdc2     0,5TB     EXT4

This was later changed to what you can see below and what fdisk correctly reports. These partitions all use the EXT4 file system.

[..]
   Device Boot      Start         End      Blocks   Id  System
/dev/sdb1            2048   524290047   262144000   fd  Linux raid autodetect
/dev/sdb2       524290048  3907029167  1691369560   fd  Linux raid autodetect
[..]
   Device Boot      Start         End      Blocks   Id  System
/dev/sdc1            2048   524290047   262144000   fd  Linux raid autodetect
/dev/sdc2       524290048  3907029167  1691369560   fd  Linux raid autodetect
[..]

I'm wondering why lshw and parted shows some of the partitions still being NTFS volumes? Checkout the output below. How can this be fixed? What is missing? Erase some header data?

Model: ATA WDC WD20EFRX-68A (scsi)
Disk /dev/sdb: 2000GB
Sector size (logical/physical): 512B/4096B
Partition Table: msdos

Number  Start   End     Size    Type     File system  Flags
 1      1049kB  268GB   268GB   primary               raid
 2      268GB   2000GB  1732GB  primary               raid


Model: ATA WDC WD20EFRX-68A (scsi)
Disk /dev/sdc: 2000GB
Sector size (logical/physical): 512B/4096B
Partition Table: msdos

Number  Start   End     Size    Type     File system  Flags
 1      1049kB  268GB   268GB   primary  ntfs         raid
 2      268GB   2000GB  1732GB  primary               raid
[..]
  *-disk:1
       description: ATA Disk
       product: WDC WD20EFRX-68A
       vendor: Western Digital
       physical id: 1
       bus info: scsi@3:0.0.0
       logical name: /dev/sdb
       version: 80.0
       serial: WD-WCC300354221
       size: 1863GiB (2TB)
       capabilities: partitioned partitioned:dos
       configuration: ansiversion=5 sectorsize=4096
     *-volume:0
          description: Linux raid autodetect partition
          physical id: 1
          bus info: scsi@3:0.0.0,1
          logical name: /dev/sdb1
          capacity: 250GiB
          capabilities: primary multi
     *-volume:1
          description: Linux raid autodetect partition
          physical id: 2
          bus info: scsi@3:0.0.0,2
          logical name: /dev/sdb2
          capacity: 1613GiB
          capabilities: primary multi
  *-disk:2
       description: ATA Disk
       product: WDC WD20EFRX-68A
       vendor: Western Digital
       physical id: 2
       bus info: scsi@4:0.0.0
       logical name: /dev/sdc
       version: 80.0
       serial: WD-WCC1T0567095
       size: 1863GiB (2TB)
       capabilities: partitioned partitioned:dos
       configuration: ansiversion=5 sectorsize=4096 signature=000a4d07
     *-volume:0
          description: Windows NTFS volume
          physical id: 1
          bus info: scsi@4:0.0.0,1
          logical name: /dev/sdc1
          version: 3.1
          serial: 013e-8473
          size: 1396GiB
          capabilities: primary multi ntfs initialized
          configuration: clustersize=4096 created=2013-06-18 06:24:11 filesystem=ntfs label=MEDIA state=clean
     *-volume:1
          description: Linux raid autodetect partition
          physical id: 2
          bus info: scsi@4:0.0.0,2
          logical name: /dev/sdc2
          capacity: 1613GiB
          capabilities: primary multi
[..]

Saturday, June 29, 2013

Petition zum Erhalt und Fortbestand der Professur für Technische Chemie an der TU Dresden

In eigener Sache bitte ich Kenner, ehemalige Studenten und Sympathisanten des Instituts für Technische Chemie Dresden um Unterstützung bei der Petition zum Erhalt und Fortbestand der einzigen Professur für Technische Chemie an der TU Dresden. Da ich selber in der Vergangenheit sehr eng mit dieser Professur (und mittelständischen Unternehmen) zusammen gearbeitet habe, waren die Ereignisse (PDF) der letzten Jahre überraschend für mich. Ich kann mir eine Technische Universität ohne die Professur kaum vorstellen.

Link zur Petition

Friday, June 28, 2013

Getting the TP-Link TL-WN772N(C) USB WLAN stick to work

After installing Debian wheezy on the N54L microserver I wanted to setup a stable WLAN connection. The stick should have out-of-the-box kernel support. First I bought a cheap ISY IWL 2000 N150 WLAN USB micro adapter (probably a branded Belkin F7D1102). I contains a Realtek chipset and although it did seem to work on my laptop with Sid running, I did not get it to work on the server. I refused to download and compile third-party software.

So I searched this site. I got the impression, that the "only" recent chipsets with reasonable support in the Linux kernel are Atheros chipsets(?). Checking the local suppliers I decided to buy a TP-Link TL-WN722NC USB stick. I've downloaded the firmware-atheros package and loaded the ath9k_htc module and voilà, the stick is running:

ath9k_htc              48534  0 
ath9k_common           12728  1 ath9k_htc
ath9k_hw              322112  2 ath9k_common,ath9k_htc
ath                    21370  3 ath9k_hw,ath9k_common,ath9k_htc
mac80211              192806  1 ath9k_htc
cfg80211              137243  3 ath,mac80211,ath9k_htc
usbcore               128741  5 ehci_hcd,ohci_hcd,usbhid,ath9k_htc
[..]
Bus 001 Device 003: ID 0cf3:9271 Atheros Communications, Inc. AR9271 802.11n
Device Descriptor:
  bLength                18
  bDescriptorType         1
  bcdUSB               2.00
  bDeviceClass          255 Vendor Specific Class
  bDeviceSubClass       255 Vendor Specific Subclass
  bDeviceProtocol       255 Vendor Specific Protocol
  bMaxPacketSize0        64
  idVendor           0x0cf3 Atheros Communications, Inc.
  idProduct          0x9271 AR9271 802.11n
  bcdDevice            1.08
  iManufacturer          16 ATHEROS
  iProduct               32 USB2.0 WLAN
  iSerial                48 12345
  bNumConfigurations      1
[..]

To setup the connection I decided to install the network-manager package and write the configuration file myself:

[connection]
id=<myID>
uuid=<myUUID>
type=802-11-wireless
autoconnect=true

[802-11-wireless]
ssid=<mySSID>
mode=infrastructure
mac-address=<myMACADDR>
seen-bssids=<myBSSIDS>
security=802-11-wireless-security

[802-11-wireless-security]
key-mgmt=wpa-psk
psk=<myPASSPHR>

[ipv4]
method=auto

[ipv6]
method=auto
[..]
wlan1     IEEE 802.11bgn  ESSID:"<ESSID>"
          Mode:Managed  Frequency:2.467 GHz  Access Point: <MACADDR>
          Bit Rate=54 Mb/s   Tx-Power=20 dBm
          Retry  long limit:7   RTS thr:off   Fragment thr:off
          Encryption key:off
          Power Management:off
          Link Quality=49/70  Signal level=-61 dBm
          Rx invalid nwid:0  Rx invalid crypt:0  Rx invalid frag:0
          Tx excessive retries:0  Invalid misc:61   Missed beacon:0
[..]

The connection comes up and it seems pretty stable. After two weeks of operation there were still no connection losses or time outs. After lease time has been reached, the IP address gets renewed. And that's it! The stick runs perfectly fine for me and I'm happy with it.

Thursday, June 27, 2013

N54L - Lüftertausch

Nachdem ich mich im Vorfeld bereits belesen hatte, erwartete ich erschwerte Bedingungen, den im N54L verbauten Gehäuselüfter gegen einen Scythe Slip Stream Gehäuselüfter 120mm mit 800 RPM und 11dB für ca. 9 EUR (SY1225SL12L) zu tauschen.

Die erste "Überraschung" erwartete mich nach dem Auspacken des neuen Lüfters: statt des erwarteten 4-Pin-Anschlusses war da nur ein 3-Pin-Anschluss sowie ein Adapterkabel zum Anschluss des Lüfters an einen 12V MOLEX-Stecker. Der Gehäuselüfter im N54L steckt jedoch mit einem 4-Pin-Anschluss am Mainboard. Um es vorweg zu nehmen: Der o.g. Scythe-Lüfter ist kein PWM-Modell und verfügt damit nicht über den vierten Anschluss. Positiv ist, das ich auch gar nicht erst die Anschlüsse am 3-Pin-Stecker tauschen musste und dieser auch sehr gut auf dem Board befestigt werden kann ... sofern man über eine Verlängerung verfügt! Diese war glücklicherweise noch vorhanden. Sogar ein Regelmodul von Zalman fand sich noch in den Überresten älterer PCs - wurde jetzt aber nicht verbaut :)

So bin ich vorgegangen um den alten Lüfter zu entfernen:

  1. N54L ausschalten und Stromversorgung trennen
  2. Fronttür des N54L öffnen - am Anschlag die Tür leicht anheben und so aus ihrer Verankerung befreien und vollständig abnehmen
  3. Kopfplatte des N54L abnehmen; Schraube an der Rückseite lösen (Handbuch); Platte zunächst nach vorne ziehen und dann leicht anheben; Blick auf den Gehäuselüfter wird freigegeben
  4. Kabel des Lüfters suchen - verläuft links neben Einschubschacht für optisches Laufwerk und dann am linken Gehäuserand bis zum Mainboard, wo der Stecker ca. 2,5cm neben dem USB-Anschluss auf dem Mainboard steckt - mit insg. 3x Kabelbindern befestigt
  5. Kabelbinder entlang des Lüfterkabels mit Seitenschneider entfernen
  6. Anschluss des Lüfters vorsichtig mit Telefonzange und Fingern vom Mainboard abziehen (ging etwas schwer)
  7. Clip auf der rechten Gehäuseseite öffnen (dagegen drücken), Lüfterkabel entfernen und Clip wieder schließen
  8. Lüfterkabel vorsichtig durch die Schächte zum Gehäuselüfter zurückziehen
  9. 4 Schrauben des Lüfters am hinteren Gehäuse mit dem Torx-Schlüssel (Servertür) lösen und entfernen
  10. vorsichtig den Lüfter entlang den Schienen nach oben ziehen - dabei habe ich die Kabel von den Festplattenplattenschächten mit einem Lineal vom Lüftergitter ferngehalten, da diese sonst in das Gitter ragten
  11. Lüfter entnehmen
  12. Befestigung des Lüftergitters lösen, indem die Stifte mit einem spitzen Gegenstand (Telefonzange) nach außen gedrückt und dann die Befestigung selbst entfernt wird

Entgegen meiner Erwartung hatte der Scythe-Lüfter die richtige Steckerbelegung für das HP-Board (Pin 4: gelb, Pin 3: rot, Pin 2: schwarz - Pin 1: "Control" wird nicht belegt). Dementsprechend musste ich gar nichts weiter tun. Lt. dieser Webseite kann der 3-Pin-Stecker einfach befestigt werden. Allerdings bleibt im N54L auf dem Board der Pin 1 (der hinterste) frei. Und so, um den neuen Scythe Lüfter einzubauen:

  1. passende Verlängerung (3-Pin auf 3-Pin) heraussuchen und an dem Stecker, der auf dem Mainboard befestigt werden soll, die linke Führungsfeder mit einem Teppichmesser abschneiden
  2. Verlängerung mit Lüfter verbinden
  3. (Testbetrieb durch Anschließen des Lüfters am Mainboard und kurzzeitiges Einschalten des Servers)
  4. Lüftergitter am Scythe-Lüfter anbringen, Stifte zum Schluss wieder einschieben und das Lüftergitter befestigen
  5. Lüfter langsam entlang der Schienen einschieben (dabei wieder die Kabel vom Lüftergitter fernhalten)
  6. Lüfter mit den vier Torx-Schrauben befestigen
  7. Kabel entlang Einschubschacht für optisches Laufwerk verlegen; in Clip auf der linken Gehäuseseite befestigen
  8. 3-Pin-Stecker auf dem Mainboard befestigen (der hinterste Pin für PWM bleibt unbelegt) - dank des Entfernens der Feder passt der Stecker :)
  9. Kabellage noch einmal prüfen und dann Lüftungskabel mit Kabelbindern an den drei originalen Stellen wieder befestigen
  10. Kopfplatte anbringen und mit Schraube an der Rückseite befestigen
  11. Tür einhängen und schließen

Nach dem Verbinden der Stromversorgung lief der Server beim Einschalten wieder an. Der Scythe-Lüfter ist hörbar leiser als der original verbaute. Das ist sehr gut. Aber für mich könnte der N54L dennoch eine Spur leiser werden.

Wednesday, June 26, 2013

Changed to blogger.com

I changed from a local wordpress installation to nanoblogger recently. The tool is nice, but becomes slow over time and misses a few features recent blogging engines already have. Therefor I was looking out for blog hosting services. Seems wordpress.com only offers domain support on charge. So I'm currently testing blogger.com.

Sunday, June 23, 2013

Idea: A new toy (ein neues Spielzeug) ... HP Microserver N54L

Ich fertige regelmäßig Backups meiner Systeme an. Diese werden auf der Systemplatte meines Notebooks abgelegt und via rsync auf mobilen Speicher dupliziert. Hierzu verwende ich eine USB-Festplatte. Diese enthält auch Medien-Dateien und wird regelmäßig an den Fernseher angeschlossen. Prinzipiell halte ich meine Daten daher für sicher. Aber vor kurzem stieß ich an die Grenzen ihrer Kapazität.

Schon länger habe ich nach einer Alternative gesucht, nicht zuletzt da heute viel größere Festplatten möglich sind und mein Laptop über einen eSATA-Anschluss verfügt, der schneller als USB2.0 ist. Meine bevorzugte Variante war ein FANTEC DB-ALU3e Gehäuse mit einer WD Red WD20EFRX 2TB (5400 RPM) Festplatte, die für den 24/7 Betrieb zertifiziert ist (und zudem über eine ausgezeichnete Reputation verfügt). Die Kombination lief sehr gut und schnell, sieht edel aus, benötigt aber eine externe Stromversorgung. Ich kann Sie als Speicherlösung absolut empfehlen.

Allerdings hatte ich zu diesem Zeitpunkt noch weitere Ansprüche, die mit der o.g. Lösung nicht zu befriedigen sind. So trage ich mich bereits länger mit dem Gedanken an ein RAID-1-NAS. Außerdem spiegelt sich die Beanspruchung meiner Notebook-Festplatte durch das Pakete-Bauen für Debian im S.M.A.R.T.-Status wieder. Daher wollte ich diese Arbeit an einen robusten lokalen buildd-Boliden abgeben und habe über den Kauf eines günstigen Rechners nachgedacht. Ein NAS verbraucht aber deutlich weniger Strom als ein Desktop-Rechner.

Also wie lässt sich ein buildd und ein energiesparendes NAS vereinen? Per Zufall stieß ich bei einem lokalen Händler auf den HP ProLiant MicroServer N40L. Das Angebot klang super und so entschied ich mich zum Kauf meines neuen Spielzeuges: ein HP ProLiant MicroServer N54L, der zukünftig folgende Aufgaben verrichten soll:

Datensicherung
Die Sicherung der Daten erfolgt cron-gesteuert auf den RAID-Verbund in eine gesonderte (verschlüsselte) Partition. Der S.M.A.R.T.-Status der Festplatten wird via smartd überwacht. Sollte eine Platte kaputt gehen, bestehen gute Aussichten, die Daten zu retten. Eine zukünftige Option wäre auch noch ein RAID-6 Verbund.
NAS / File-Server
Das Gerät verfügt über bis zu 6 SATA Anschlüsse. Davon werden vier standardmäßig via Wechselrahmen belegt. Die mitgelieferte 250GB Festplatte wird vorerst das Betriebssystem aufnehmen und an den drei verbleibenden Anschlüssen werden zunächst drei WD Red WD20EFRX 2TB (5400 RPM) Festplatten als RAID-5-Verbund für den notwendigen Platz sorgen. Letzterer lässt sich ohne Erweiterung nur via Software-Raid und mdadm realisieren.
buildd
Betriebssystem wird Debian GNU/Linux. Der Hauptspeicher wird auf mindestens 8GB ECC-Ram aufgerüstet.
HTPC (XBMC)
Der Microserver lässt sich nicht als Massenspeicher an einen Fernseher anschließen. Daher soll vorr. XBMC in Verbindung mit einem USB3.0 BR/DVD-Player den Server zum Entertainment-Gerät erheben.

Das ganze soll möglichst wenig Strom verbrauchen und leise sein. Zum Anschluss an das lokale Netzwerk habe ich mich für WLAN entschieden, da kein Gigabit-Ethernet vorhanden ist. Folgende Teile benötige ich für "meinen" Server:

Server
HP ProLiant N54L MicroServer mit Turion II Neo 2,2 GHz, 2GB RAM/250GB HDD - ca. 200 EUR (lokal)
Belüftung / Lautstärke
Scythe Slip Stream Gehäuselüfter 120mm 800RPM 11dB - ca. 9 EUR (SY1225SL12L)
Scythe Slip Stream Gehäuselüfter 120mm 500RPM 7,5dB - ca. 8 EUR (SY1225SL12SL)
Netzwerk
TP-Link TL-WN722N(C) 150Mbps USB-Adapter - ca. 15 EUR (TL-WN722N(C))
File-Server
3x WD Red WD20EFRX 2TB 5400 RPM SATA600 für NAS 24/7 - ca. 95 EUR / St. (WD20EFRX)
buildd
8GB (2x4GB) Kingston ValueRAM DDR3-1333 CL9 ECC Modul RAM-Kit - ca. 85 EUR (KVR1333D3E9SK2/8G)
16GB (2x8GB) Kingston ValueRAM DDR3-1333 CL9 ECC Modul RAM-Kit - ca. 145 EUR (KVR1333D3E9SK2/16G)
HTPC
Sapphire Radeon HD 5450/6450/6570/6670/7750 PCIe 16x Low-Profile passiv/aktiv - ca. 25..100 EUR (11166-45-20G, 11190-09-20G, 11191-27-20G, 11191-02-20G, 11192-18-20G, 11202-10-20G)
SILVERSTONE PCIe 1x USB3.0 2xInt 2xExt - ca. 21 EUR (SST-EC04-P)
Logitech K400 od. Keysonic ACK-540RF - ca. 40 EUR (920-003100 bzw. ACK-540 RF)
BR/DVD-Player od. Brenner mit USB3.0 Anschluss - 50..100 EUR
LCD-Mod
LDC Display Modul mind. 4x20 - ca. 10 EUR

Interessant ist auch noch die Option einer echten RAID-Karte. Ich stieß dabei auf die IBM ServeRAID M1015 (46M0831) und diesen Hinweis. Kauft man stattdessen den "Schlüssel" zur Freischaltung des vollen Funktionsumfanges, dann bezahlt man (lokal) zusätzlich ca. 150 EUR! Aber das nur BTW.

Nützliche Links: